文件
提交单个文件
1
2
3
git commit <file> -m "your comment"
git pull
git push提交多个文件,但是需要排除指定的文件
1
2
3
git add -u
git reset -- main/dontcheckmein.txt
然后进行commit、pull等操作
Git fork后的分支,更新最新的源代码
1 | sourcer为源项目代码 |
比较文件,在不同版本的区别
1 | uncommited file to HEAD |
查看每一行是哪次提交最后修改的
1 | git blame filename |
列出文件的所有修改记录
1 | git log -p filename |
删除远程仓库文件,但保留本地文件系统的文件
1 | 文件 |
回滚代码
method 1: 重置当前分支的 HEAD 指针以及工作目录和暂存区的内容到指定的提交,擦除了目标提交之后的所有提交历史。
1
git reset --hard <commit-id>
Method 2: 只想回滚到指定提交,并保留后续提交历史
1
git revert <commit-id>
分支
查看分支提交历史
1 | git log --oneline --graph --decorate |
查看分支对应的远程分支
git branch -vv
更改当前分支对应的远程分支
git branch -u origin/develop
回滚远程分支
1、本地代码回滚到上一版本
git reset –hard HEAD~1
(或者回滚到指定版本commitId)
git reset –hard commitId
2、加入-f参数,强制提交,远程端将强制跟新到reset版本
git push -f
拉取远程分支
First, fetch the remote branches:
git fetch origin
Next, checkout the branch you want. In this case, the branch we want is called “branchxyz”.
git checkout -b branchxyz origin/branchxyz
新建分支
To create a new branch from a branch you do NOT have checked out:
git branch new_branch from_branchTo create a new branch from the branch you DO have checked out:
git branch new_branchTo create and check out a new branch from the branch you DO have checked out:
git checkout -b new_branchTo create and check out a new branch from a branch you do NOT have checked out:
git checkout -b new_branch from_branchTo rename a branch
git branch -m old_name new_name
推送新分支到远程
在新建分支完成的前提下
将develop分支推送到远程
git push origin new_branch:new_branch建立本地至上游(远程)分支的链接
git branch --set-upstream-to=origin/new_branch new_branch如果要推送到的远程分支 origin/new_branch 与本地分支 new_branch 名字相同,那可以使用
git branch –set-upstream-to origin new_branch
删除分支
1 | // delete branch locally (如果要删除这个分支的话,需要跳转至其他分支后进行删除操作) |
重命名分支
1 | git branch -m new-branch-name |
暂存区
查看暂存内容的差异:
1
git diff --cached
重置暂存区(对于所有文件):
1
git reset
stash
在Git中,stash命令用于暂存当前未提交的代码修改,以便在后续时刻再次应用它们。它可以暂存已修改但还未添加到暂存区的文件,也可以暂存已经添加到暂存区但还未提交的文件。
以下是stash命令的使用方式:
暂存当前修改:(这个命令将当前的修改暂存起来,让你的工作目录变成干净的状态。)
1
git stash
恢复暂存的修改:
1
git stash apply
这个命令将之前暂存的修改应用到当前分支上。如果你有多个stash,可以使用
git stash apply stash@{n}来指定恢复某个特定的stash。删除stash:
1
git stash drop
这个命令会删除最近的一个stash。
列出所有stash:
1
git stash list
应用并删除stash:
1
git stash pop
这个命令相当于
git stash apply和git stash drop的组合,它会将最近的一个stash应用到当前分支,并将其删除。暂存特定的文件:
1
git stash push path/to/file
这个命令可以将指定的文件暂存起来,而不是暂存整个工作目录。
给stash添加描述:
1
git stash save "stash message"
rebase
更新本地主分支(通常是 master 或 main): 获取原始仓库的最新更改并合并到你的本地主分支:
1
2git checkout master # 切换到你的本地主分支
git pull upstream master # 从原始仓库拉取最新更改到本地主分支或
1
git fetch upstream
切换到你的分支并进行 rebase: 切换到你的分支并将其 rebase 到主分支上:
- 如果是新分支
1
2git checkout <新分支>
git rebase master # 将新分支 rebase 到你的本地主分支- 如果是已有分支
1
2git checkout <已有分支>
git rebase upstream/master解决冲突(如果有): 如果在 rebase 过程中出现冲突,你需要手动解决冲突,然后使用
git add标记为已解决。- 展示冲突代码(可省略)
1
git diff --name-only --diff-filter=U
- 解决代码冲突
- IDE手动解决
- vimdiff解决
- meld解决
- 解决之后
1
2
3git add . # resolve conflict, always use add & commit 🚨
git commit -m "xxx"
git rebase --continue- 终止rebase
1
git rebase --abort
推送更改到远程仓库: 推送你的更改到远程仓库:
- 如果是新分支
1
2
3git push origin <分支> --force # 强制推送到你的 fork 仓库的新分支上
或
git push -f origin <分支>请注意:使用
--force参数进行强制推送时,请确保你了解它的影响。它可能会覆盖远程分支的历史记录,因此务必小心操作。- 如果是已有分支
1
git push
创建 Pull Request: 在你的 fork 仓库中,从新分支创建一个 Pull Request(PR),将你的更改合并到原始仓库的目标分支
commit rule
1 | <type>(<scope>): <subject> |
Type
You can use your own commit types, but here are the most common use cases:
feat: a new feature, or change to an existing feature.
fix: Fixing a bug or known issue in code.
test: Adding additional tests for existing features.
chore: Updating build tools, like webpack, gulp, ascripts, etc.
docs: Update to documentation like README, wiki, etc.
Scope
The scope of the commit can be kept as granular as required and is bound to change based on the complexity of the project. If you are starting off a project, it might not seem necessary at the beginning, although, it is highly recommended as it makes you think twice and harder about the changes that you are about to push.
squash/reword commit
merge the last 3 commits into a single commit.
1
git rebase -i HEAD~3
replace all those
pickwithsquash(or simplys) apart from the first one.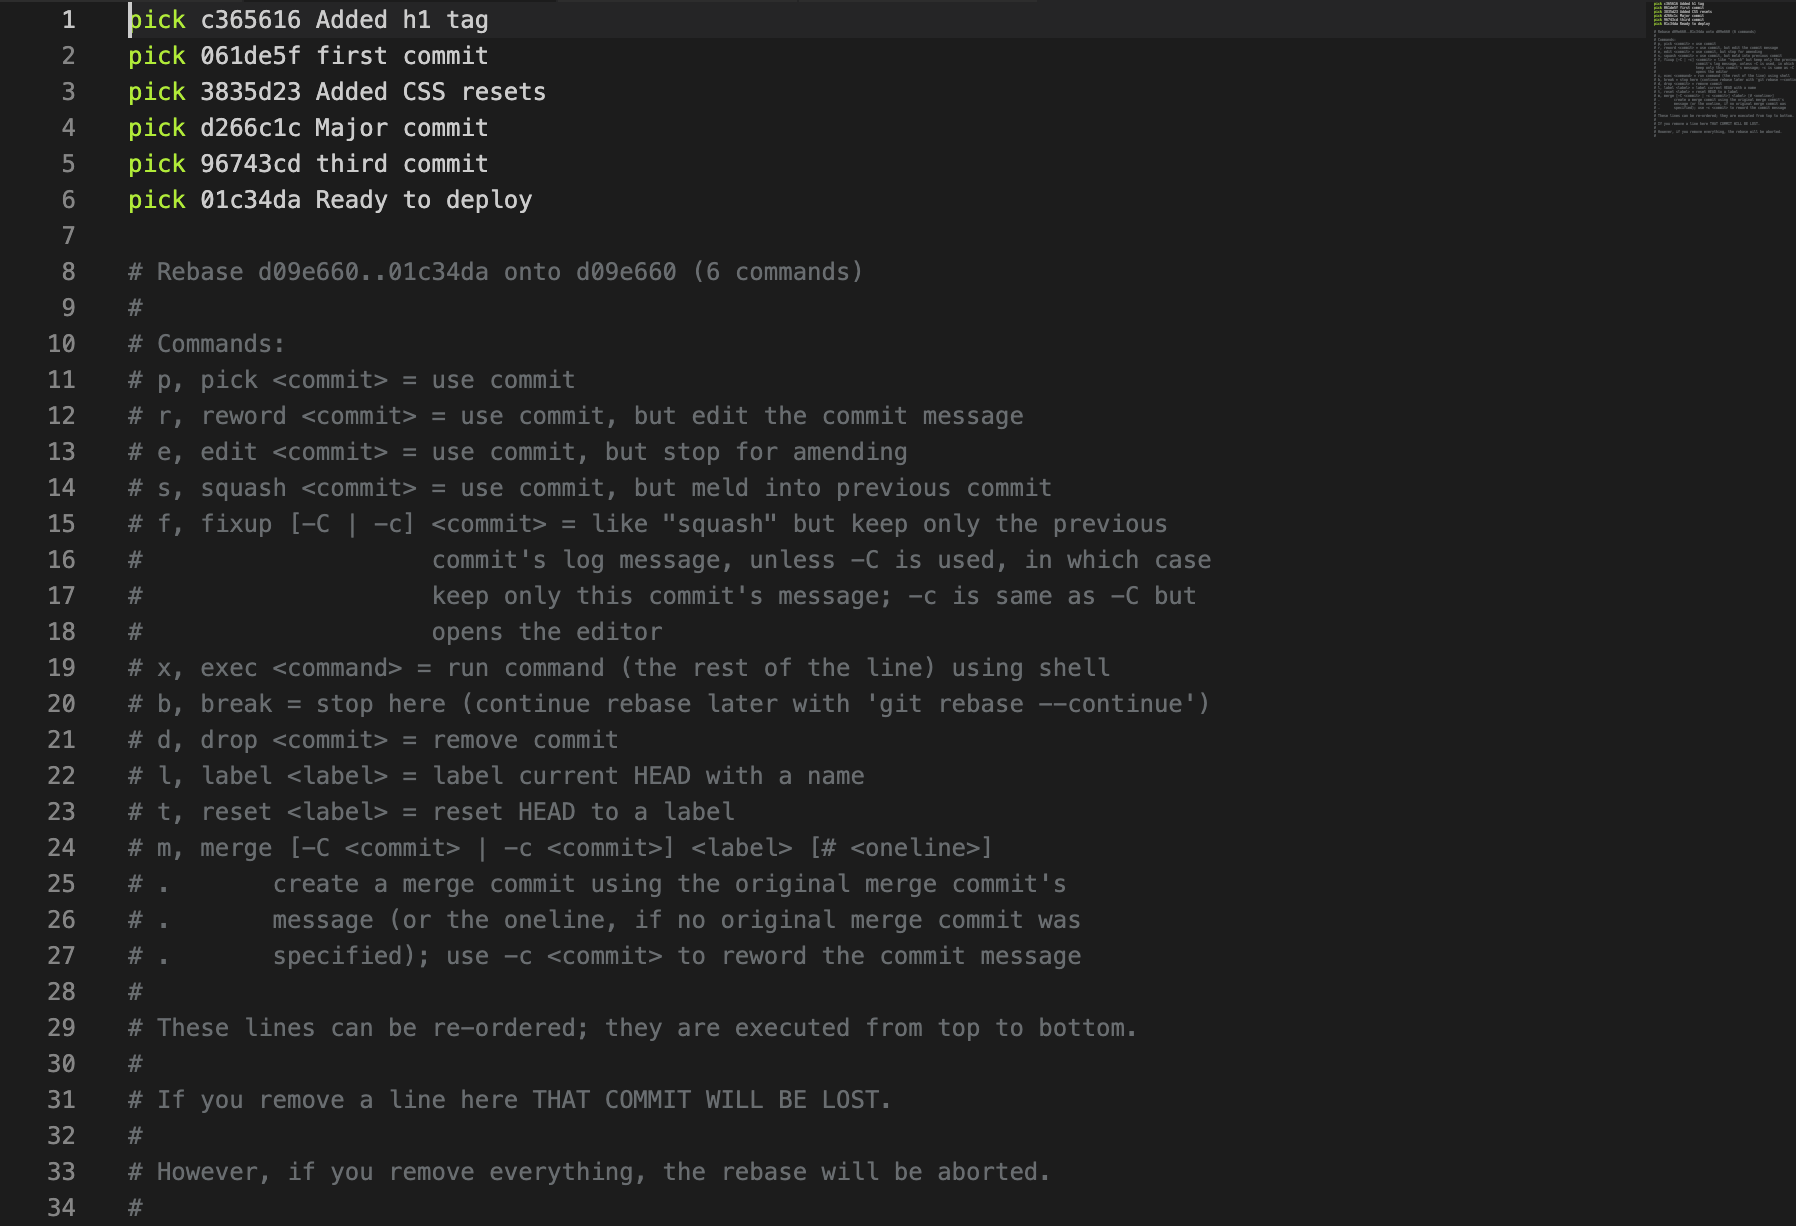
Note:
pickorpwill only use those commits, butsquashorswill use them and combine them all together.The first commit is the one you will combine them into without losing your changes.
注意,一般需要 squash的是后面的commit,需要保证第一条(最早的)commit 信息不被 squash
After doing that, save the file and close it. Git will open up another editor where you can see the new commit message it generates for you.
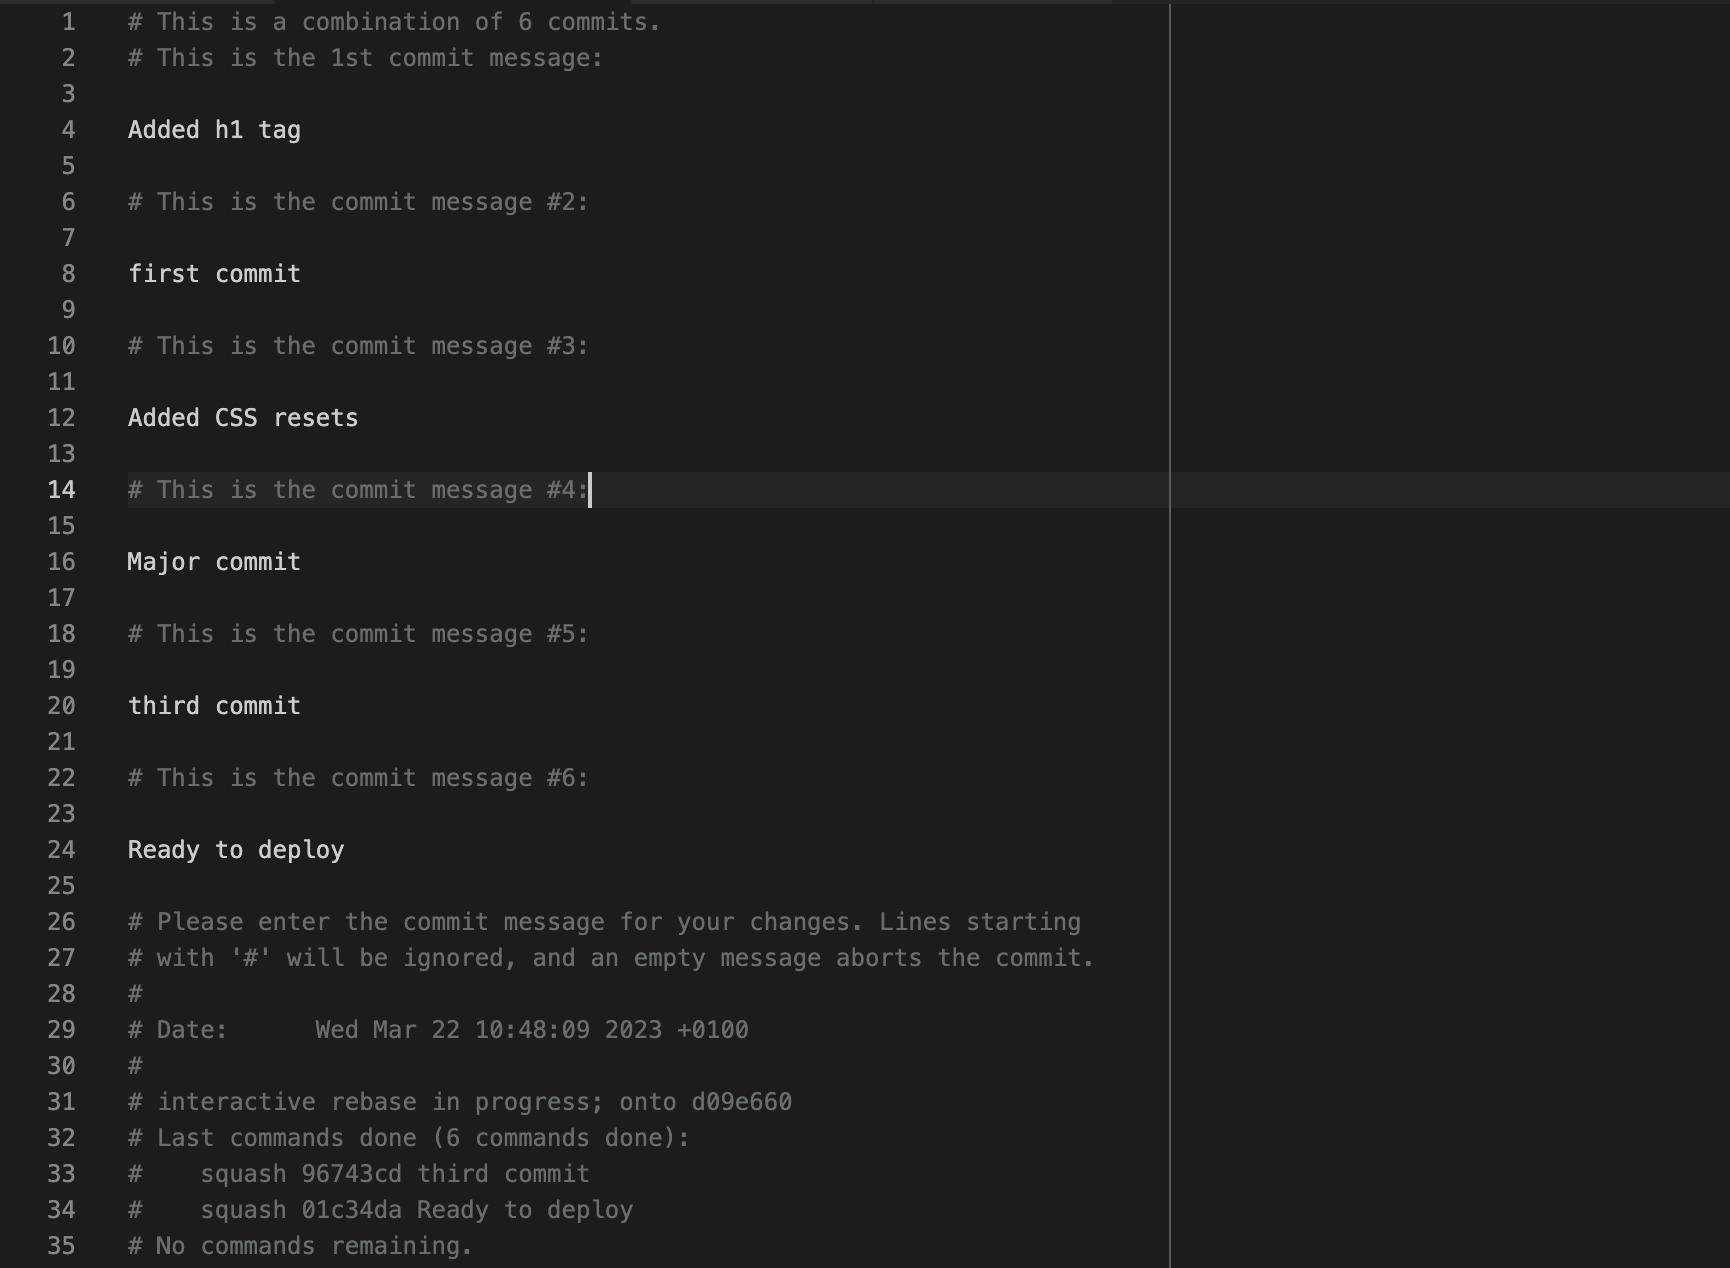
You can get rid of all of them and add your custom message:
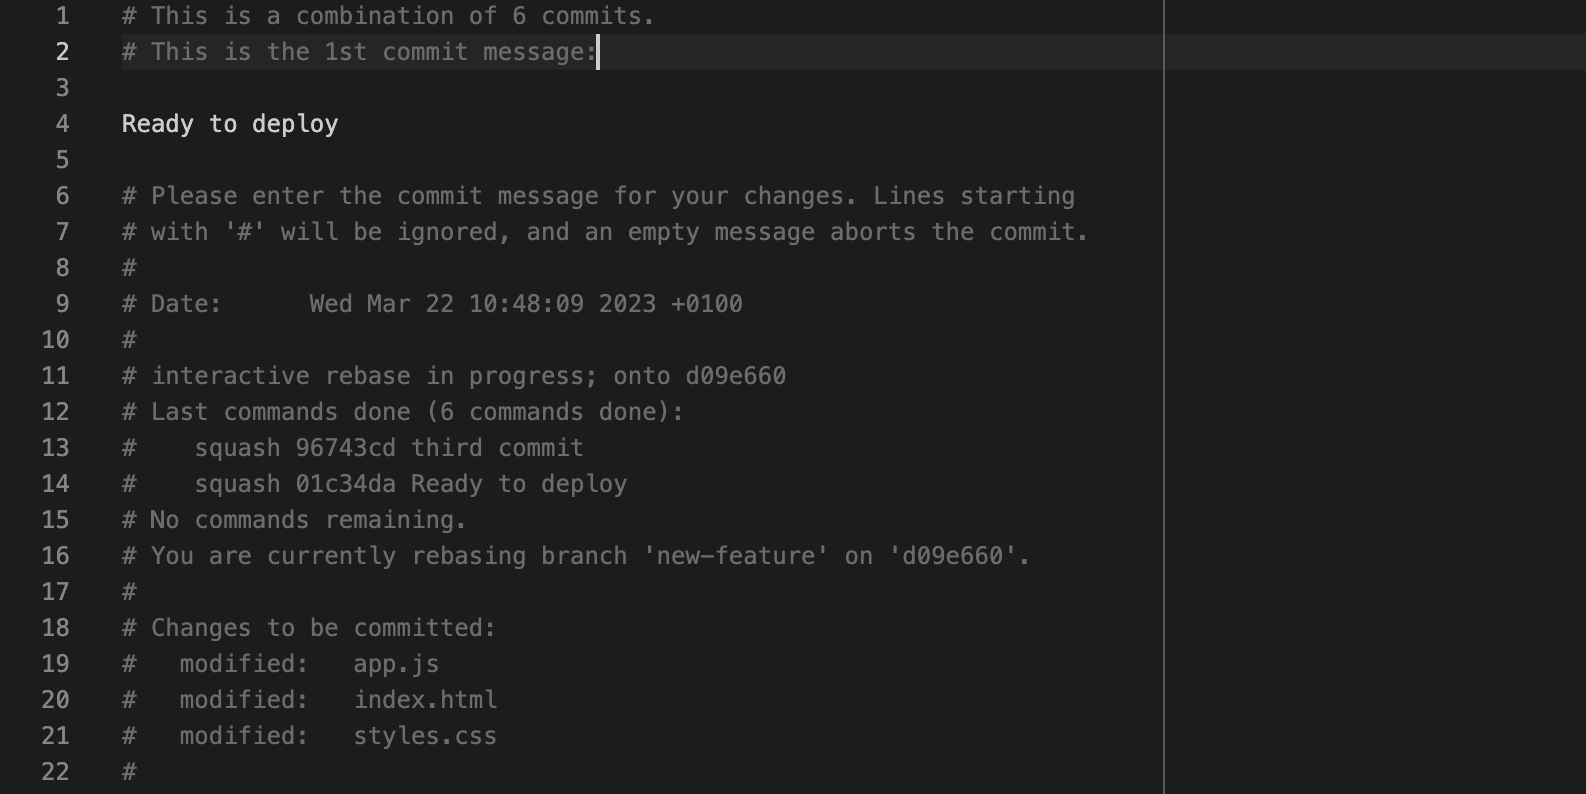
Or you can leave it as is. If you add a new commit message, save the file and close it.
Pushing changes, You should run git push to add a new commit to the remote origin. If you have already pushed your commits, then you should force push them using the git push command with — force flag (suppose, the name of remote is origin, which is by default)
1
git push --force origin HEAD
中途如需终止rebase,运行 git rebase –abort
其它结合
1
2
3
4
5- 先进行 `git rebase upstream/v1` 可以确保你的分支是基于最新的上游代码。
- 然后进行 `git rebase -i HEAD~2` 让你可以在最新代码的基础上修改你的提交。
这个顺序可以减少冲突的可能性,因为你先将你的代码基于最新的上游代码,然后再修改你自己的提交。
remote
fork remote
初始化仓库
List the current configured remote repository for your fork.
1
2
3git remote -v
origin https://github.com/YOUR_USERNAME/YOUR_FORK.git (fetch)
origin https://github.com/YOUR_USERNAME/YOUR_FORK.git (push)Specify a new remote upstream repository that will be synced with the fork.
1
git remote add upstream https://github.com/ORIGINAL_OWNER/ORIGINAL_REPOSITORY.git
Verify the new upstream repository you’ve specified for your fork.
1
2
3
4
5git remote -v
origin https://github.com/YOUR_USERNAME/YOUR_FORK.git (fetch)
origin https://github.com/YOUR_USERNAME/YOUR_FORK.git (push)
upstream https://github.com/ORIGINAL_OWNER/ORIGINAL_REPOSITORY.git (fetch)
upstream https://github.com/ORIGINAL_OWNER/ORIGINAL_REPOSITORY.git (push)
同步代码
Change the current working directory to your local project.
Fetch the branches and their respective commits from the upstream repository. Commits to
BRANCHNAMEwill be stored in the local branchupstream/BRANCHNAME.1
2
3
4
5
6
7
8
9
10git fetch upstream
remote: Counting objects: 75, done.
remote: Compressing objects: 100% (53/53), done.
remote: Total 62 (delta 27), reused 44 (delta 9)
Unpacking objects: 100% (62/62), done.
From https://github.com/ORIGINAL_OWNER/ORIGINAL_REPOSITORY
* [new branch] main -> upstream/main
指定fetch某个分支
git fetch <remote> <branch>Check out your fork’s local default branch - in this case, we use
main.1
2git checkout main
Switched to branch 'main'Merge the changes from the upstream default branch - in this case,
upstream/main- into your local default branch. This brings your fork’s default branch into sync with the upstream repository, without losing your local changes.1
2
3
4
5
6
7
8git merge upstream/main
Updating a422352..5fdff0f
Fast-forward
README | 9 -------
README.md | 7 ++++++
2 files changed, 7 insertions(+), 9 deletions(-)
delete mode 100644 README
create mode 100644 README.mdIf your local branch didn’t have any unique commits, Git will perform a fast-forward. For more information, see Basic Branching and Merging in the Git documentation.
1
2
3
4
5git merge upstream/main
Updating 34e91da..16c56ad
Fast-forward
README.md | 5 +++--
1 file changed, 3 insertions(+), 2 deletions(-)If your local branch had unique commits, you may need to resolve conflicts. For more information, see “Addressing merge conflicts.”
submodule
对于项目中包含子项目的git项目
reference
https://www.git-scm.com/book/en/v2/Git-Tools-Submodules
https://git-scm.com/book/zh/v2/Git-%E5%B7%A5%E5%85%B7-%E5%AD%90%E6%A8%A1%E5%9D%97
如何是首次克隆,初始化代码需要
git clone --recurse-submodules https://github.com/chaconinc/MainProject
或如果首次没有使用--recurse-submodules,那后面可以通过
git submodule init和git submodule update,进行子模块的拉取更新
如何要对子模块的代码也用克隆地址
git config -f .gitmodules -e # opens editor, update URLs for your forksgit submodule sync
后期从远程仓库更新submodule代码
1 | git submodule update --remote |
在已有项目添加子模块
1 | git submodule add https://xxx.git configserver |
其它
合并策略
warning: 不建议在没有为偏离分支指定合并策略时执行pull操作。
您可以在执行下一次pull操作之前执行下面一条命令来抑制本消息:
1 | git config pull.rebase false # 合并(缺省策略) |
您可以将 “git config” 替换为 “git config –global” 以便为所有仓库设置
缺省的配置项。您也可以在每次执行 pull 命令时添加 –rebase、–no-rebase,
或者 –ff-only 参数覆盖缺省设置。
推送本地离线项目到远程github
1 | mkdir my_project |
更改https协议进行推送
如果之前是使用ssh协议进行推送,现改为http协议
查看当前Git项目的远程地址
1
git remote -v
该命令会列出所有已配置的远程仓库地址,并显示它们的读取和写入访问URL。示例输出如下所示:
1
2origin https://github.com/username/repository.git (fetch)
origin https://github.com/username/repository.git (push)其中,
origin是远程仓库的名称,https://github.com/username/repository.git是远程仓库的地址,(fetch)和(push)分别表示读取和写入访问URL。将Git仓库的URL替换为HTTP协议的URL
1
git remote set-url origin http://gitlab.xxx.com/username/repository.git
然后使用以下命令进行Git push操作
后记:需要注意的是,使用HTTP协议进行Git push操作的速度可能会比使用SSH协议慢一些,因为HTTP协议需要建立TCP连接、发送HTTP请求、接收HTTP响应等过程。同时,HTTP协议的安全性也比SSH协议稍低,因此在安全性要求较高的情况下,建议使用SSH协议进行Git push操作。
Git修改.gitignore不生效
在git中,如果想忽略某个文件,不让这个文件提交到版本库中,可以修改根目录中的.gitignore文件
但有时候把某些目录或者文件加入忽略规则,发现并未生效
未生效原因:.gitignore只能忽略那些原来没有被追踪(track)的文件,如果某些文件已经被纳入了版本管理中,则修改.gitignore是无效的
解决方案:先把本地缓存删除(改变成未track状态),然后提交。
1 | git rm -r --cached <要忽略的具体文件或者目录> 或者 git rm -r --cached . |